Our SOLO phone booths have changed slightly over the years. Therefore, the solutions to this problem differ depending on which "generation" you have.
Please select the type of feet your booth has, and we will show you how to solve your issue.
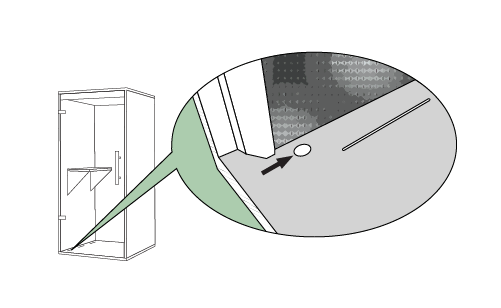

Location:
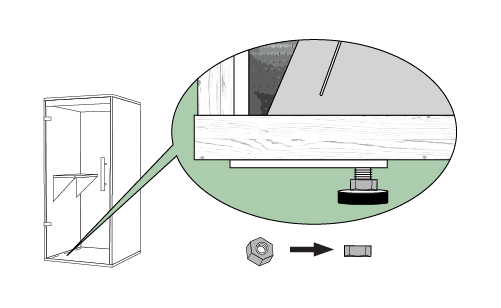
Assembly:
Door:


